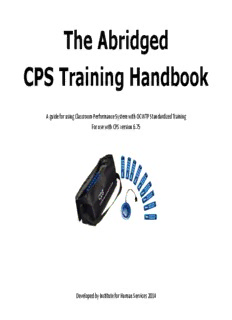
The Abridged CPS Training Handbook PDF
Preview The Abridged CPS Training Handbook
The Abridged CPS Training Handbook A guide for using Classroom Performance System with OCWTP Standardized Training For use with CPS version 6.75 Developed by Institute for Human Services 2014 Table of Contents System Requirements 3 CPS Help 4 Equipment Setup 5 Keypad Distribution 6 Remove Previous CPS Software Versions 7 CPS Software Download and Installation 9 Copying CPS and PowerPoint Data 12 Engage CPS with PowerPoint 15 Navigating PowerPoint with Integrated CPS 18 Managing Keypad Responses 20 Troubleshooting 22 2 System Requirements System Requirements: Microsoft Windows XP SP2, Windows Vista, or Windows 7 or 8 Intel or AMD 600 MHz processor 2 GHz equivalent or higher (or equivalent) 2 GB RAM 1 GB hard disk space for installation Video Card and display capable of XVGA (1024 x 768) or higher resolution with minimum of 24-bit color One available USB 2.0 port Microsoft Office 2003, 2007, 2010, or 2013 (for PowerPoint integration) 3 CPS Help Please contact: Christina Carter with any general CPS questions. Email: [email protected] Phone: 614-251-6000 RTC Super User(s) Email Phone SEORTC Carmen Mitchell [email protected] (740) 592-9082 SWORTC Darren Varnado [email protected] (513) 946-2276 WORTC Cheryl Woods [email protected] (937) 427-4540 Carlos Craig [email protected] CORTC (614) 278-5919 Christy Mayle [email protected] ECORTC Brian Wear [email protected] (740) 432-2355 Luke Owens [email protected] (216) 881-5387 NCORTC Eddie Lebron [email protected] (216) 881-5390 NEORTC Jodie Hembree [email protected] (330) 379-1867 Nicholas Toncic [email protected] NWORTC (419) 213-3300 Rebbeca Battles [email protected] For even more information on CPS or to purchase your own personal CPS equipment, visit www.einstruction.com 4 Equipment Setup 1. Connect your laptop/computer to the LCD projector using the VGA cable. 2. Connect your laptop/computer to the CPS receiver using the USB cable. Note: The CPS receiver does not have a separate power supply . CPS Receiver Placement: The receiver works via infrared signals. Be sure to place the receiver in a central location and high enough that it will be able to receive the signal from each keypad. 5 Keypad Distribution and Collection 1. Number Range: Each keypad is numbered. Choose a consecutive range of keypads that matches the number of participants in your class. For example: If you have 20 participants in your class, you could use keypad numbers 1-20. Note: You may want to add a couple of extra keypads within your selected range in case you have late arrivals to your class. Once you set the keypad range you will not be able to go back and change it. 2. Random Distribution: Distribute the keypads randomly within your range so that number 2 isn’t sitting beside number 3, for example. 3. Receiver Placement: The receiver works via infrared signal. It must be placed in such a way that the keypads all have “line of sight” access. Hooking it over the top of a flipchart stand may work well. 4. Keypad Malfunction: If you find a keypad that is not operational, assign a different keypad within the range in its place. Please notify the RTC immediately of any equipment that is not working properly. 5. Keypad Collection: Be sure to collect all keypads before dismissing class participants for the day. 6 Remove Previous Version of CPS In order to install CPS version 6.75, you will need to remove any previously installed version of CPS from your computer. Your screens may look different than what is pictured here depending on what operating system you have on your computer. The following examples are from Windows 7. 1. Choose Control Panel from the start menu 2. Choose Programs > Unin- stall a program. Note: If you have never installed CPS software before, skip this step and proceed to Page 9: “CPS Software Download and Install”. 7 Remove Previous Version of CPS (continued) 3. Select “Classroom Performance Sys- tem” in the list of programs then choose “Uninstall” from the options at the top of the list. 8 Download and Install Classroom Performance System Software The CPS Installation file is VERY LARGE (over 200 MB) and will take CONSIDERABLE time to download from the Internet. It is highly recommended that you borrow an installation disk from your RTC or IHS as an alternative. If you need to download the installation files from the Internet, go to the bottom of the “For Trainers” section of the OCWTP website homepage to be linked to CPS download options. 9 Download/Install Classroom Performance System (continued) After selecting the appropriate CPS download link, install the software to your computer’s hard drive. Step 1 : Save File - Choose a location that you will easily remember Step 2: Wait for the file to download to your computer Step 3: Open the downloaded file 10
Description: